This guide shows you how to add RankAI's technical SEO script to your Wix site. The script runs in the background on your site and helps search engines understand your pages better. You don't need any coding experience. We'll add one block of code in Wix's Custom Code area and apply it. Custom Code is available on a Premium Wix plan.
Where to get your code
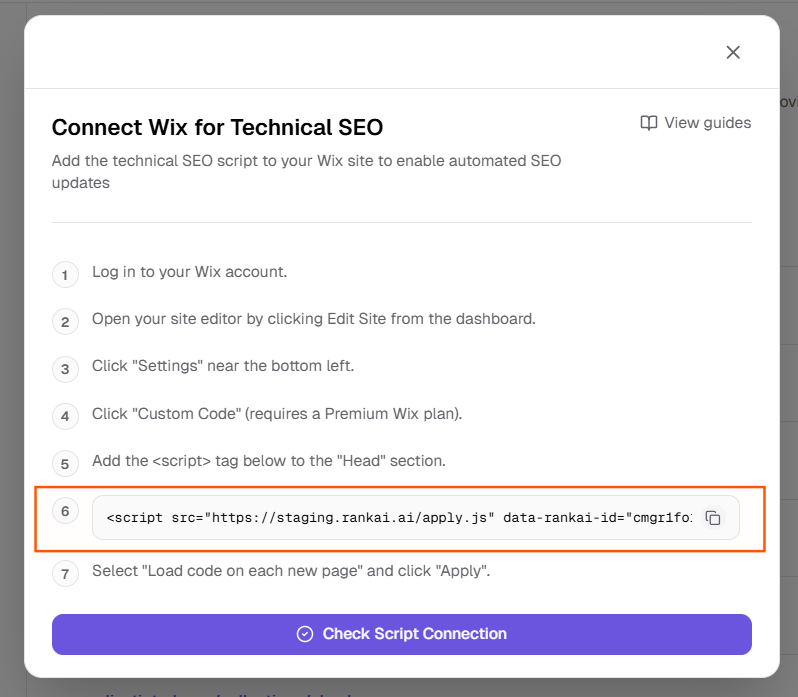
In your RankAI project, go to Technical SEO & GEO and look for the Apply Changes button at the top right and Click it. Select Wix as the provider. snippet of code that looks like the one below. Copy the whole thing. Your version will have your own project ID in it.
<script src="https://rankai.ai/apply.js" data-rankai-id="YOUR_PROJECT_ID" crossorigin="anonymous" defer></script>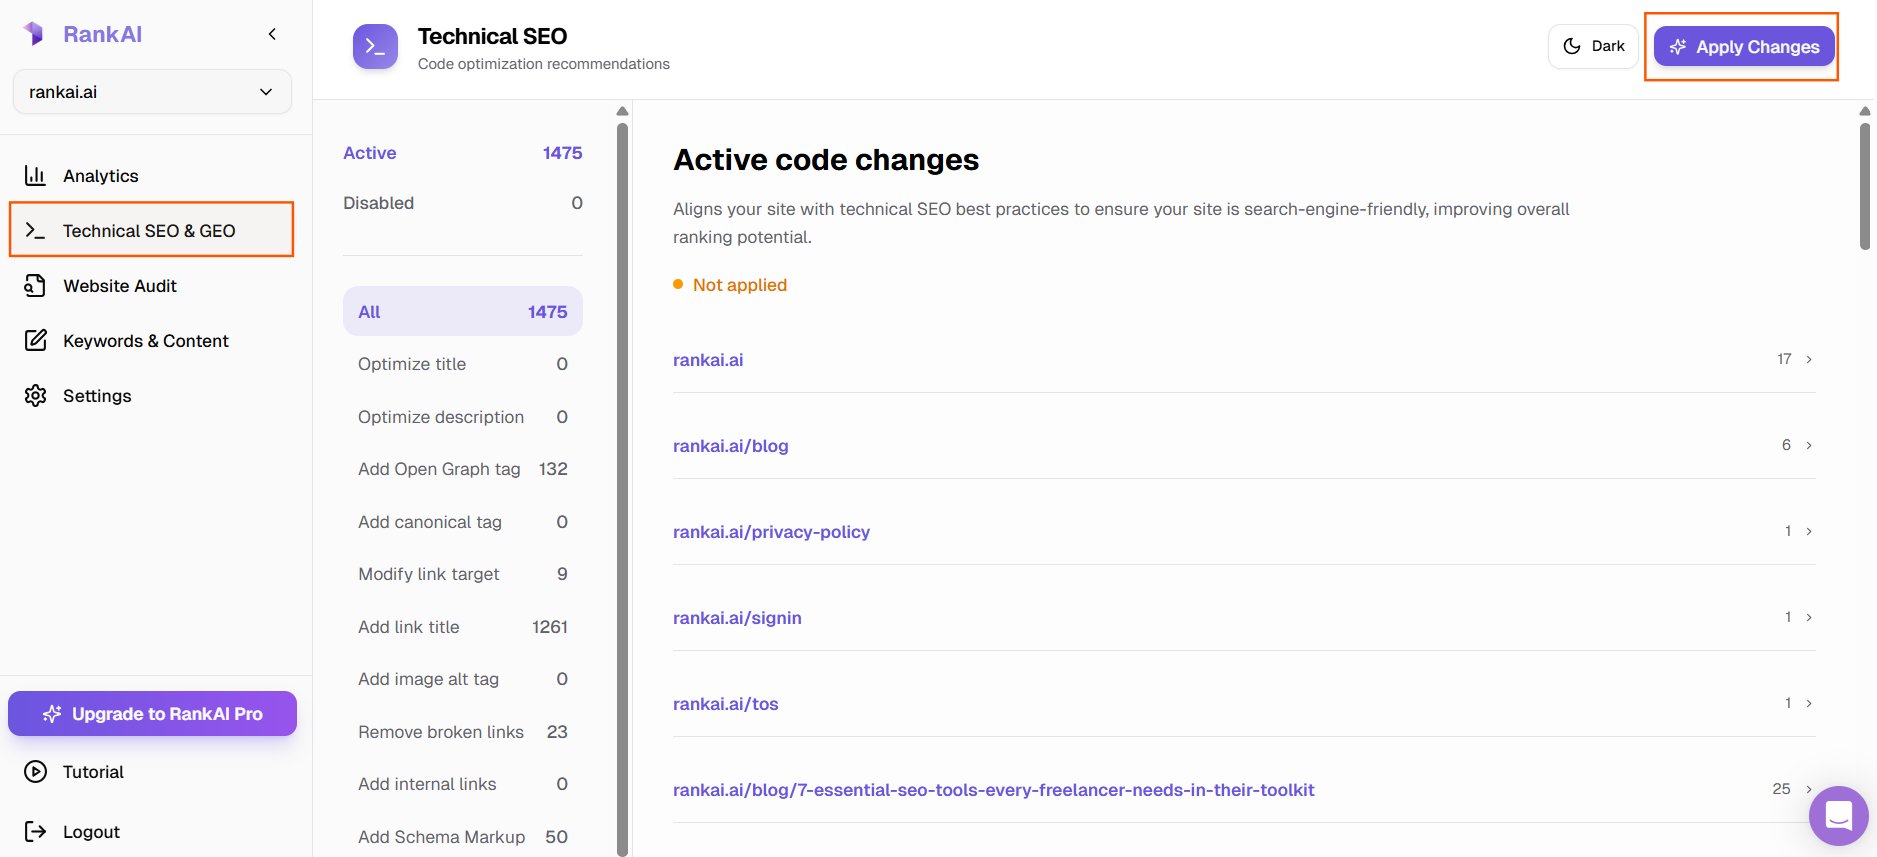
Keep that code handy. In the next steps we'll add it to your Wix site so it loads on every page.
Step 1: Log in to your Wix account
Open your browser and go to wix.com. Click Log In in the top right. Enter the email and password you use for your Wix account.
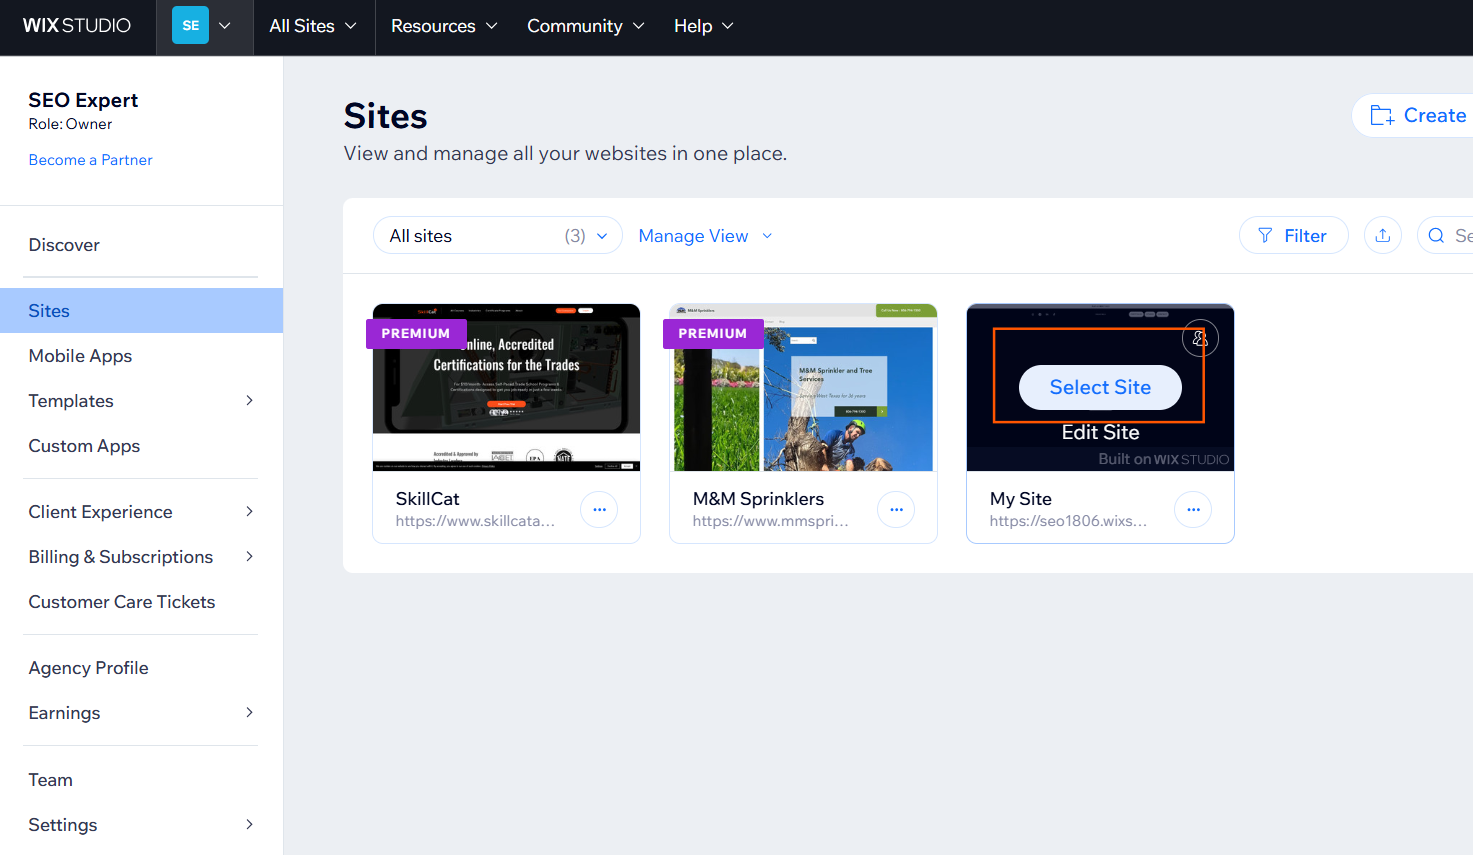
After you log in, you'll see your dashboard with your sites. That's the screen where you can open or manage your sites. Find the site you want to add the RankAI script to.
Step 2: Open your site editor
On the dashboard, Hover over the site you want to edit and click the Select Site button. The Wix Editor will open.
We need to open Settings next. You'll find it near the bottom of the left side of the sidebar.
Step 3: Open Settings
In the Wix Editor, look at the left side. Near the bottom you'll see Settings (often with a gear icon). Click Settings.
A panel or menu will open with options like General, SEO, and more. We need Custom Code in the next step.

Step 4: Open Custom Code
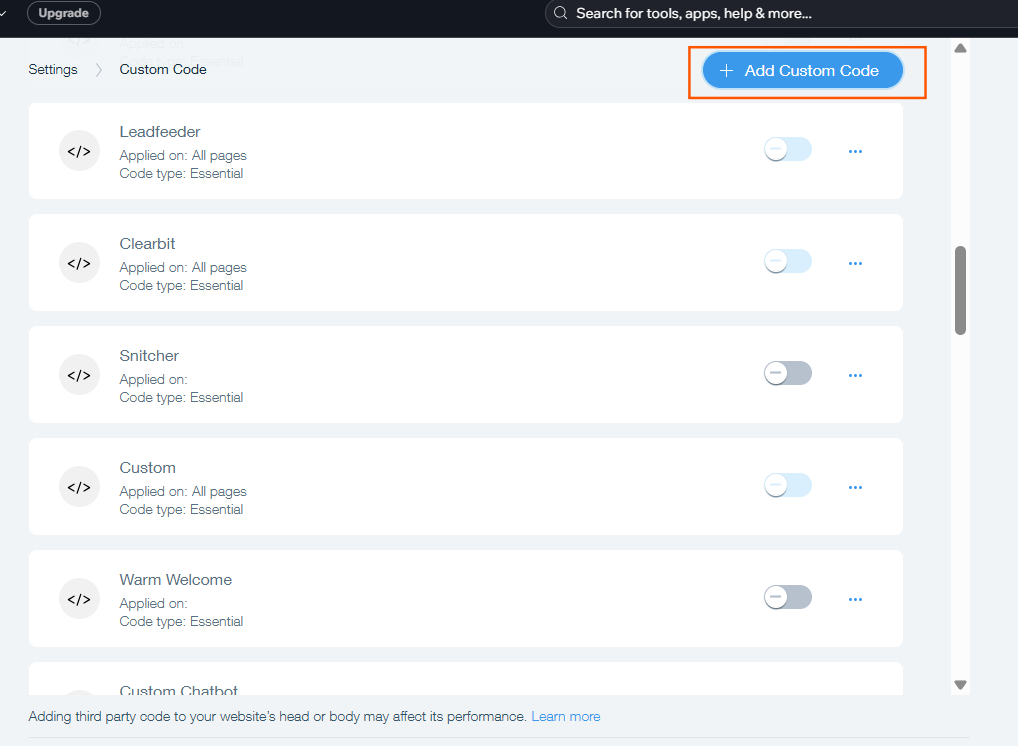
In the Settings panel, look for Custom Code and click it. If you don't see it, Custom Code is only available on a Premium Wix plan (or similar paid plan). You may need to upgrade to use this feature.
You'll see a button + Add Custom Code where you can add code to site. We'll paste the RankAI script there in the next step.
Step 5: Add the script to the Head section
In the Custom Code screen, enter the code snippet you copied from RankAI, Give it a Name and set Place code in: to Head. Other options default.
Make sure you paste the entire line, from <script to </script>. Don't change or remove any part of it. Give the code a name if Wix asks (for example "RankAI").

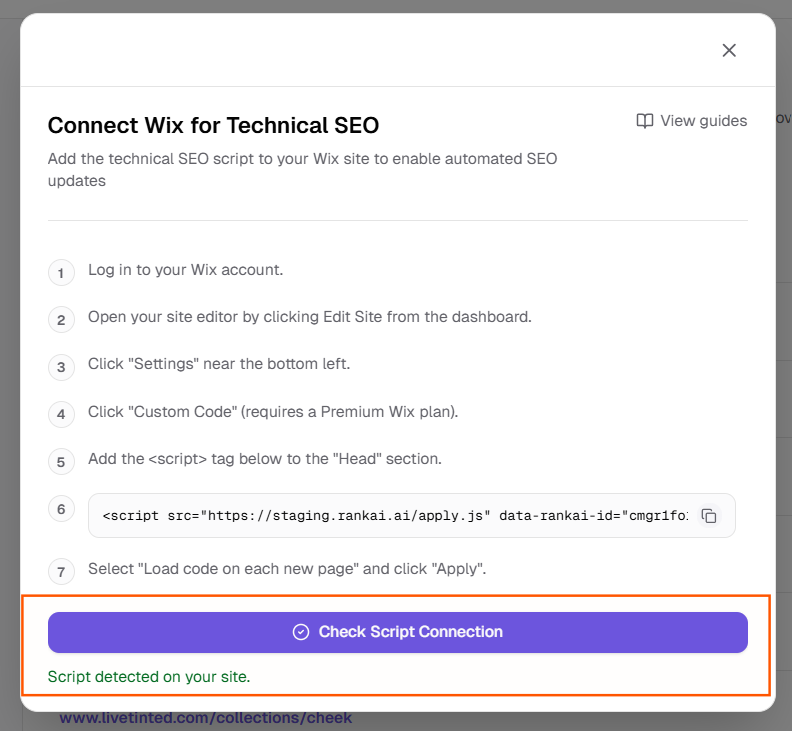
Step 6: Verify the script is installed correctly
Now go to RankAI tab again and click Check Script Connection. If you see a text in green saying Script detected on your site, the script is connected correctly.
Quick checklist
- Logged in to your Wix account
- Clicked Edit Site from the dashboard
- Clicked Settings (near the bottom left)
- Clicked Custom Code (Premium plan required)
- Pasted the full script into the Head section
- Selected "Load code on each new page" and clicked Apply
- Checked script connection in RankAI (Check Script Connection)
FAQ
I don't see Custom Code in Settings. Why?
Custom Code is only available on a Premium (or other paid) Wix plan. If you're on a free plan, you'll need to upgrade to add custom code to your site. Check Wix's current plans to see which one includes Custom Code.
Should the script go in the Head or the body/footer?
Use the Head section. That way the script loads at the top of the page as intended. Wix may also offer a "Body - end" or similar option; for RankAI, use Head.
How do I know if it's working?
After applying, open your live site in a new tab (publish first if you haven't). You can use your browser's "View page source" option (usually right-click then View Page Source) and search for "rankai" or "apply.js". If you see the script in the source code, it's loaded correctly.
Where can I get more support?
Contact your RankAI account team or check the help section in your dashboard.