Squarespace doesn't offer a direct API for blog publishing. This guide uses a WordPress bridge: you publish from RankAI to a temporary WordPress site, then export from WordPress and import into Squarespace. RankAI tracks your live URLs on Squarespace using a path you choose (e.g. blog).
Where to start in RankAI
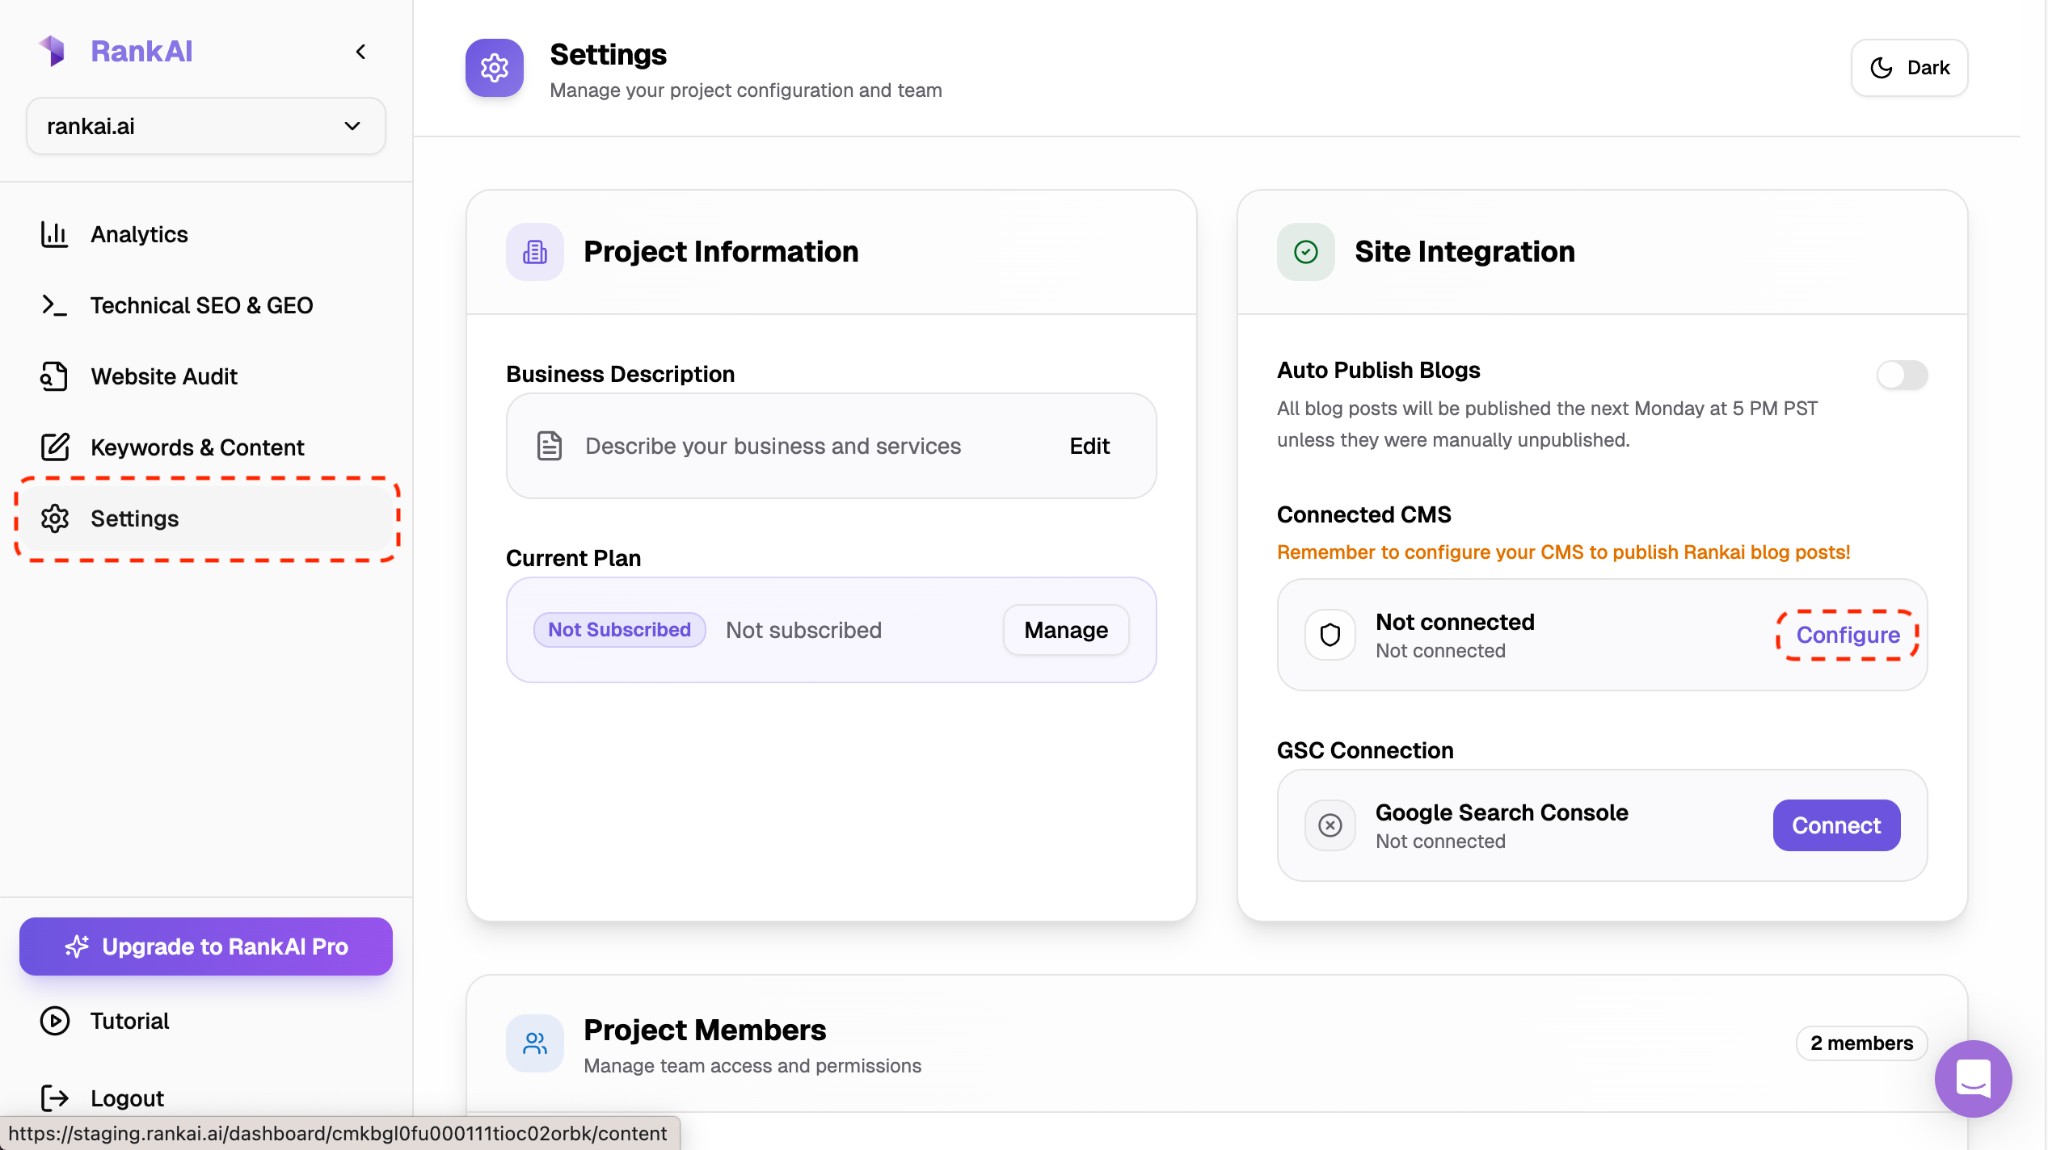
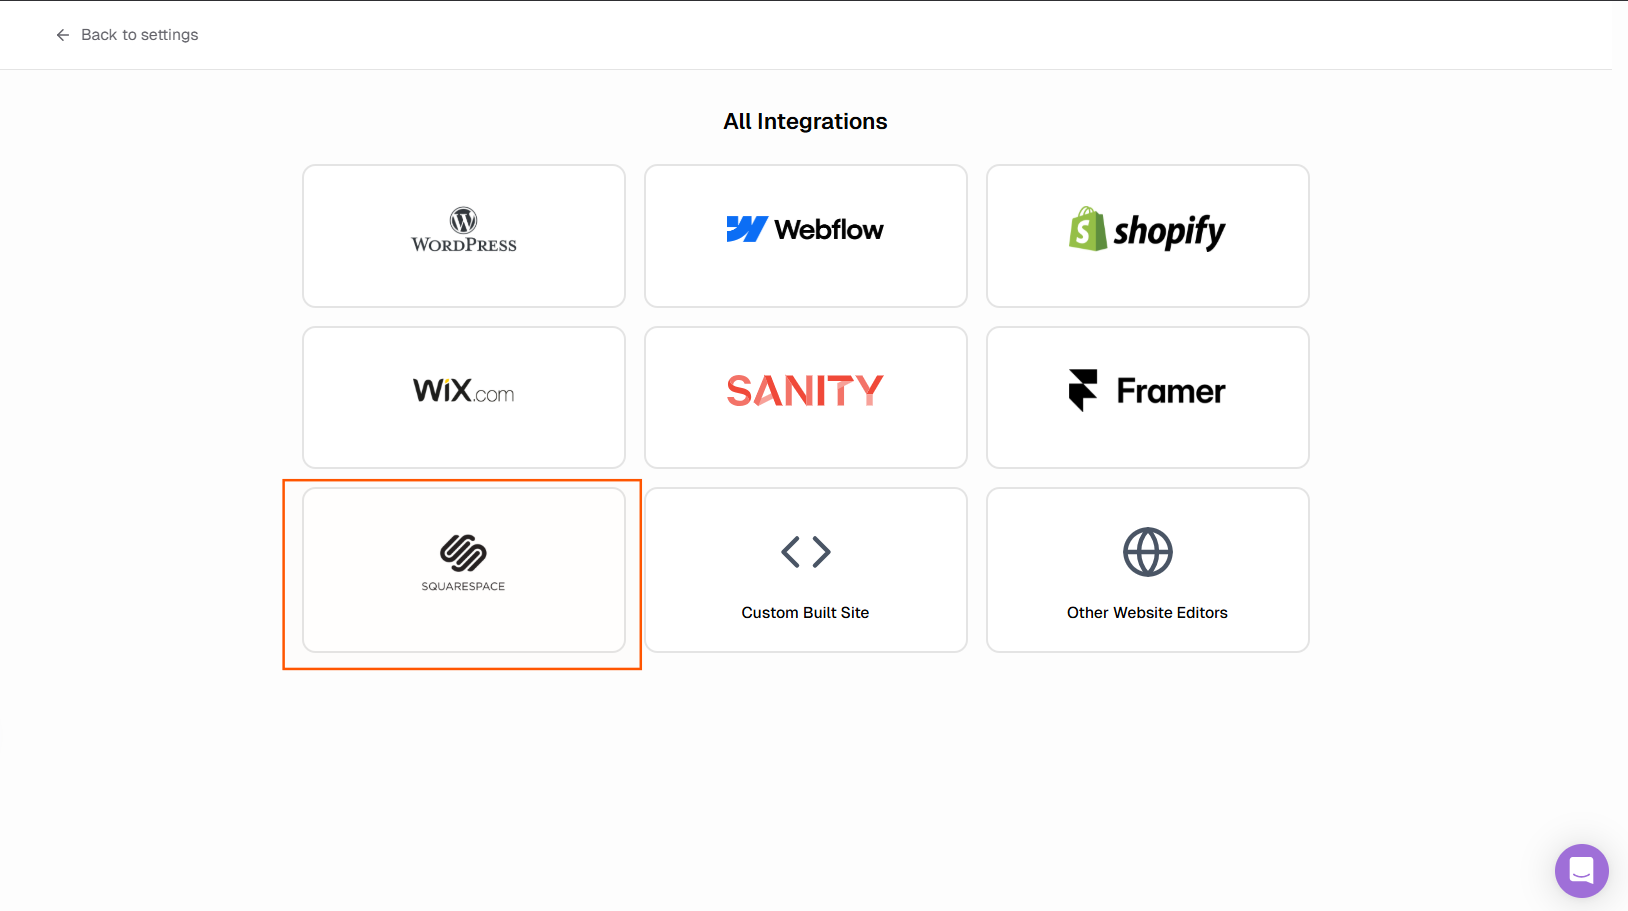
In your RankAI project, open Settings → Site Integration → Connected CMS and click Configure. Select Squarespace. You'll set up WordPress bridge credentials and your Squarespace blog path there.
Step 1: Set up a temporary WordPress site
Create a cheap, simple WordPress site (e.g. on WordPress.com, or any host that supports WordPress). This site is only used as a stepping stone: RankAI publishes posts here, you export them, then import into Squarespace. You don't need to point your domain to it.
Make sure the WordPress site has the REST API enabled (default) and that you can create an Application Password in your user profile (under Users → Profile → Application Passwords).
Step 2: WordPress bridge credentials (follow the WordPress guide)
The steps for entering your site URL, getting an application password, and connecting credentials are the same as for a direct WordPress site. Follow the WordPress blog integration guide for:

- Step 1 in the WordPress guide: Enter your site URL — use your temporary WordPress site URL (e.g.
https://my-temp-wp.example.com). - Step 2 in the WordPress guide: Get an application password — go to your temporary WordPress admin → Profile → Application Passwords, create one, and copy your username and the generated password.
- Step 3 in the WordPress guide: Connect your credentials — enter that username and application password in RankAI and click Connect.
In RankAI, do these steps in the Squarespace integration screen (not the WordPress one). You'll also see a field for Blog path on Squarespace — enter the path where your posts live on your Squarespace site (e.g. blog so URLs look like yoursite.com/blog/post-slug). Then click Connect. RankAI will verify the WordPress bridge and save the settings.
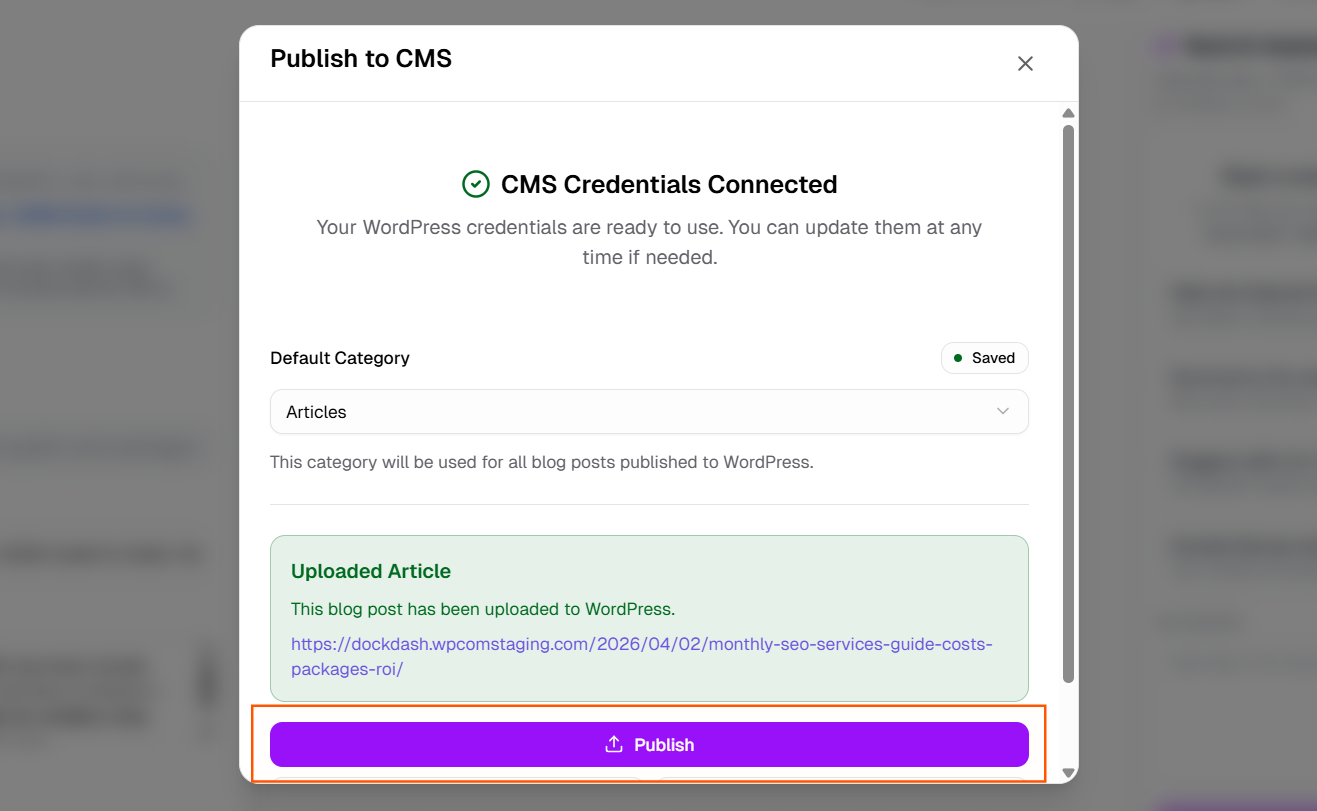
Step 3: Publish a post from RankAI to WordPress
When you publish a post from RankAI, we send it to your WordPress bridge site. After that, you'll export from WordPress and import into Squarespace (steps below). RankAI will record the final Squarespace URL using your project domain and the blog path you set (we do not use the WordPress post URL for tracking).
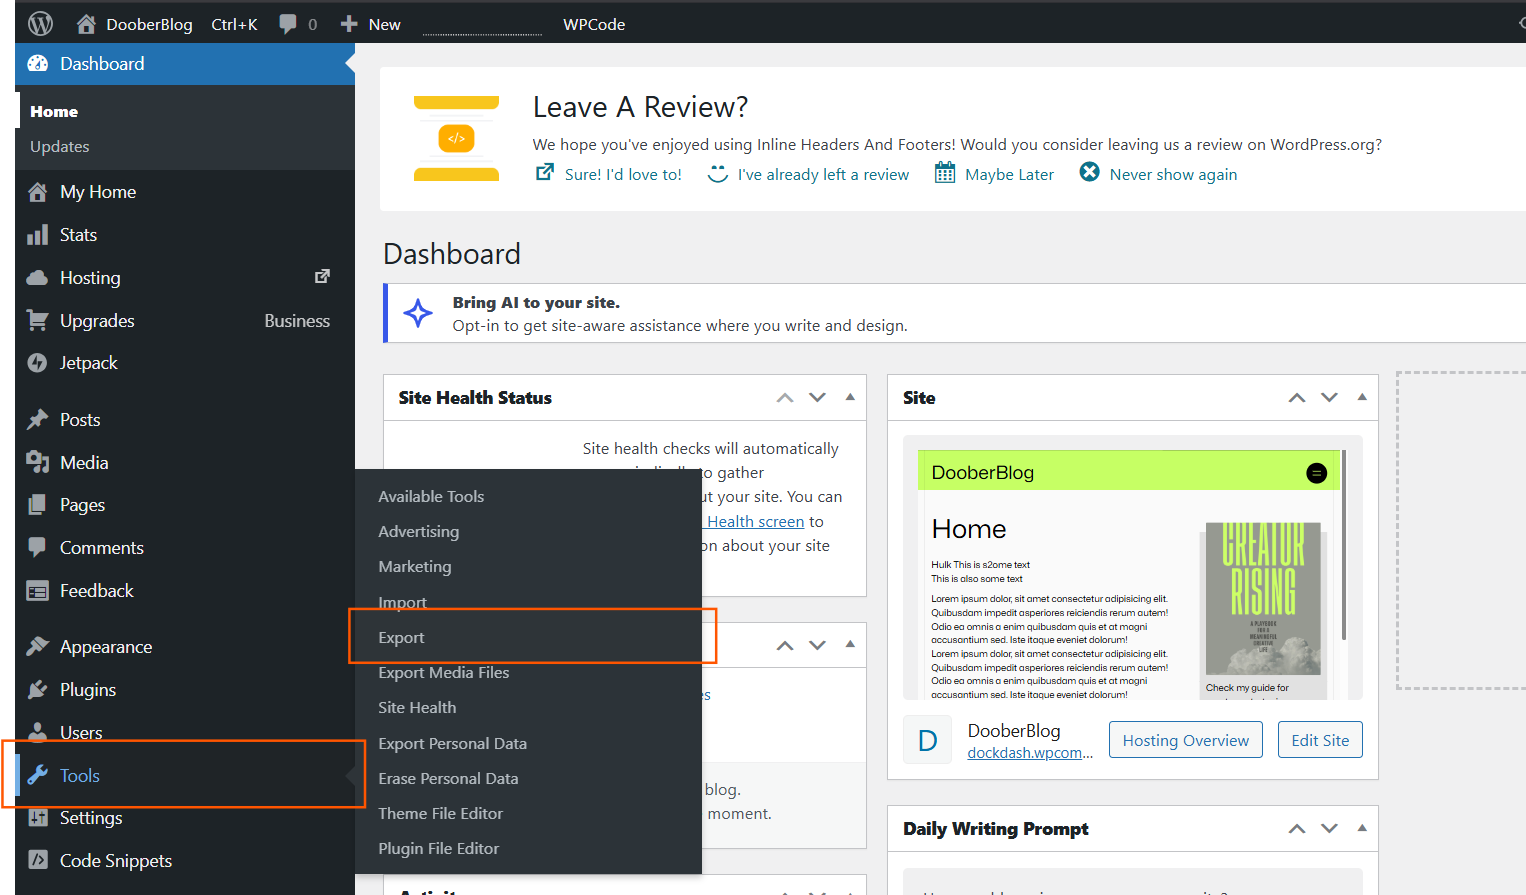
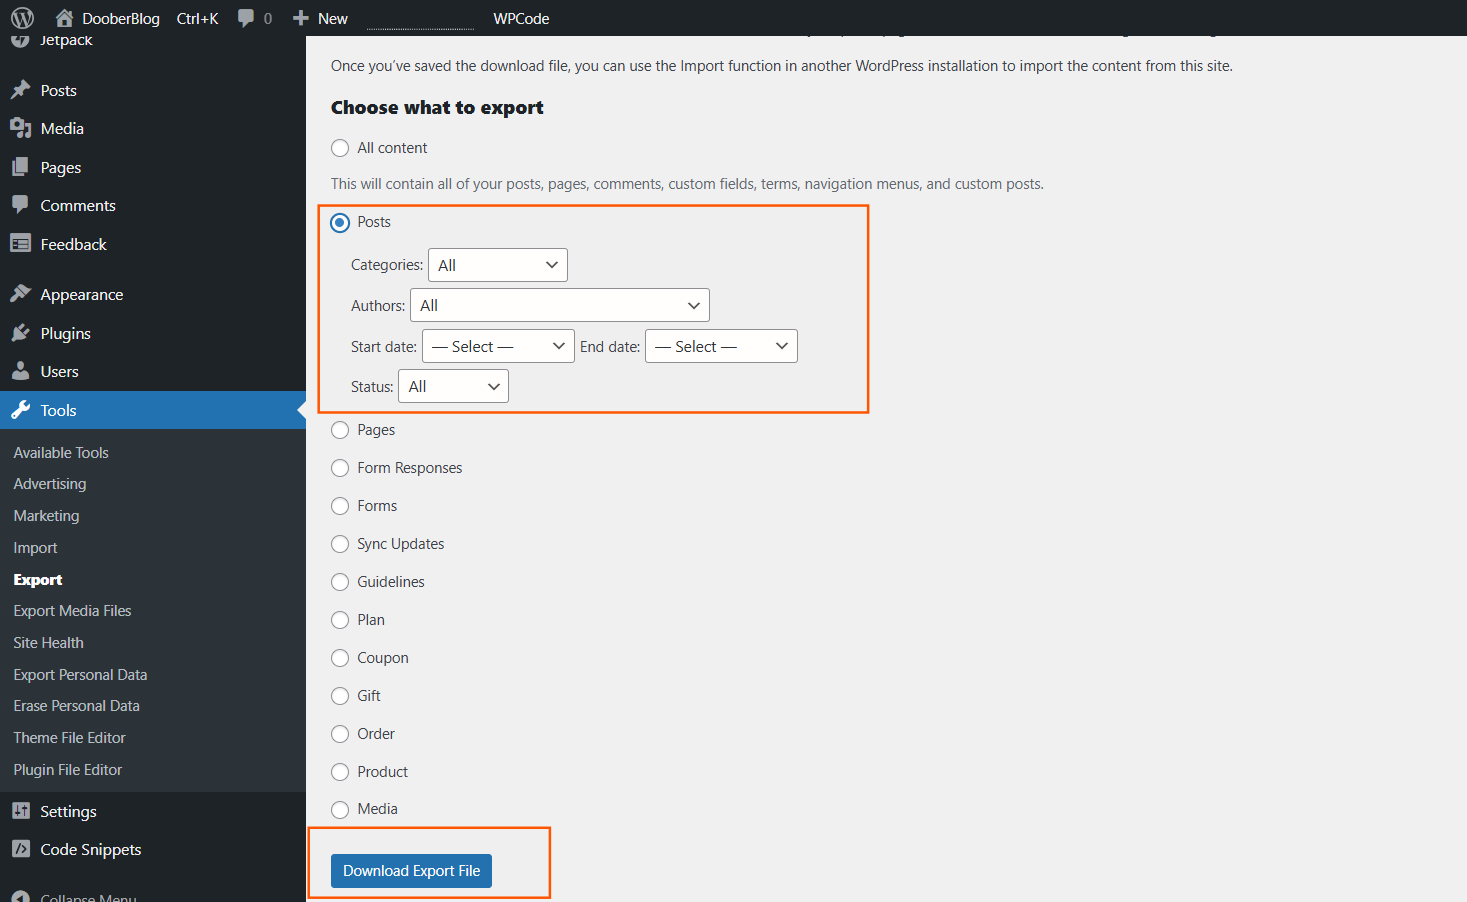
Step 4: Export from WordPress
In your Bridge WordPress site:
- Go to Tools → Export.
- Select Posts and click Download Export File.
- Save the XML file.
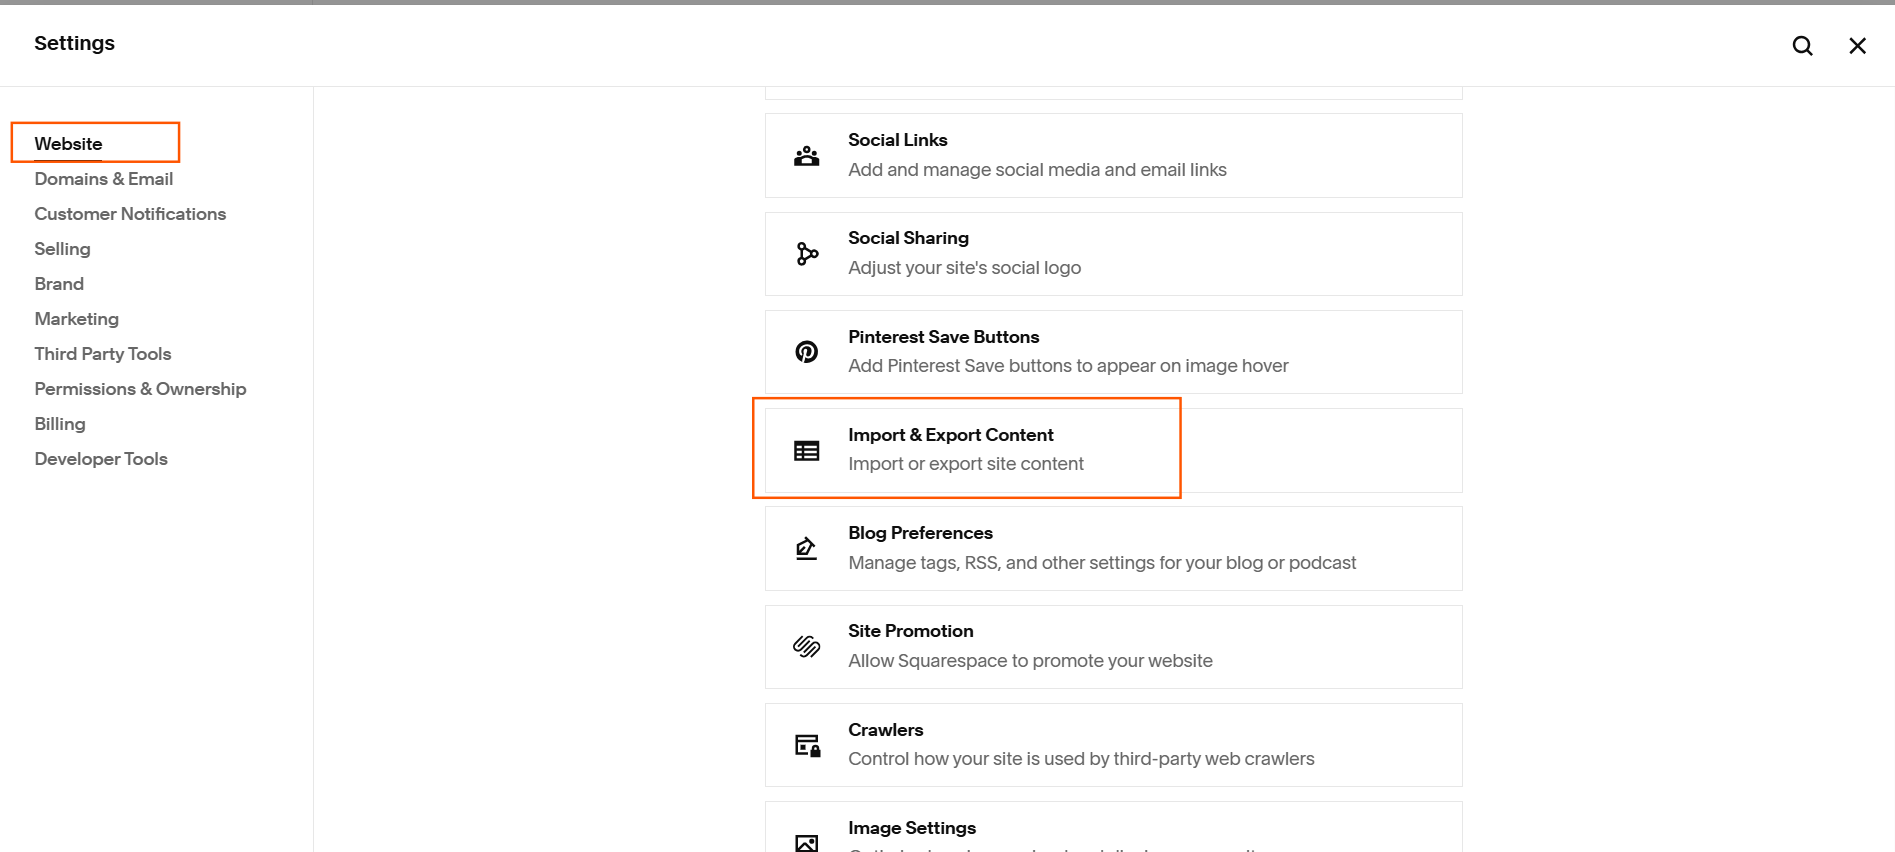
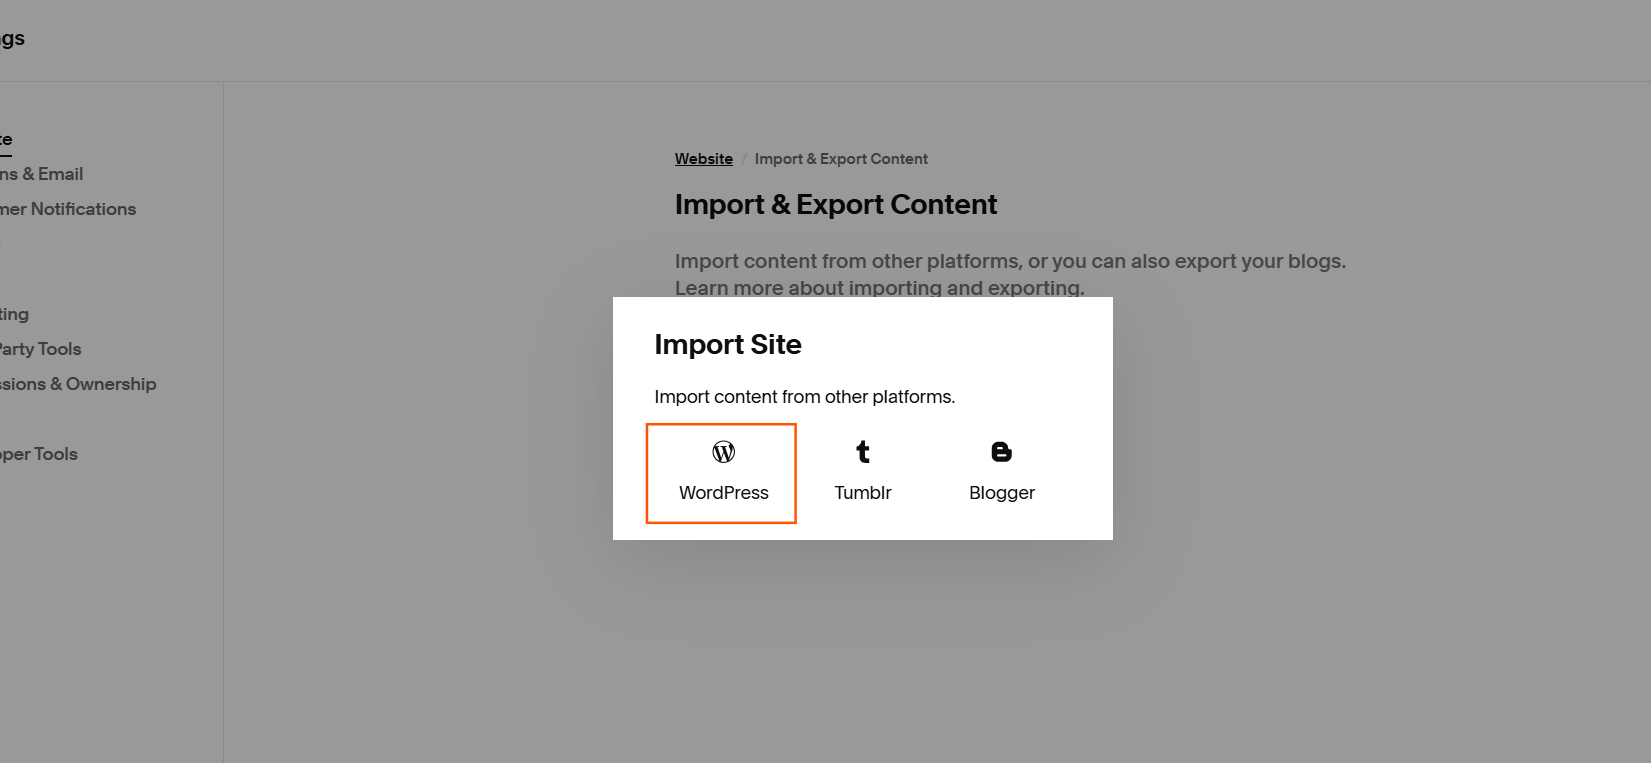
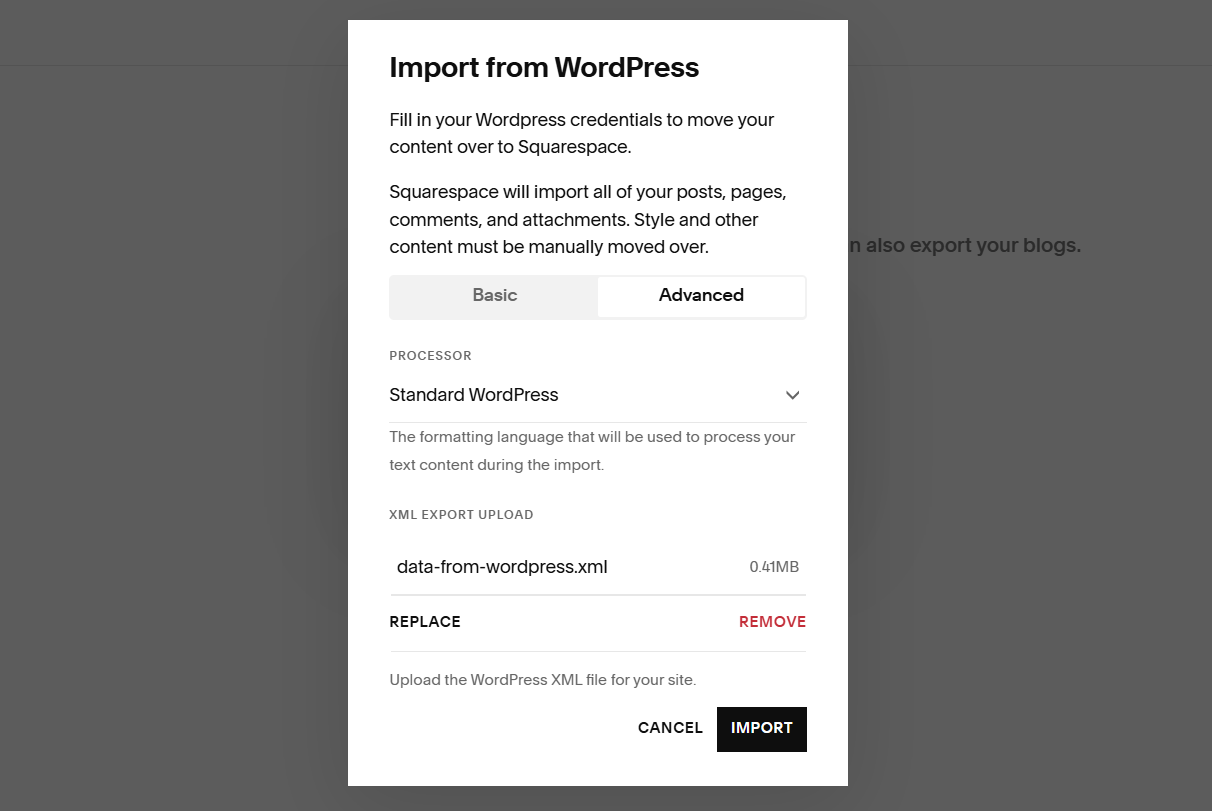
Step 5: Import into Squarespace
In your Squarespace site:
- Go to Settings → Website → Import & Export Content.
- Choose Import → WordPress.
- Select Advanced → Upload the WordPress XML file you exported and click Import.
- Wait for the import to finish (it can take a few minutes).
Review and organize the imported content in Squarespace as needed.
Limitations
- Real-time automation is not possible; export/import is manual.
- You need to maintain a temporary WordPress site and repeat export/import for each batch of posts.
This workflow gives you a way to use RankAI content on Squarespace with correct URL tracking for SEO.
Quick checklist
- Created a temporary WordPress site
- Followed the WordPress blog integration guide for site URL, application password, and connecting credentials (in the Squarespace screen, plus blog path)
- Published from RankAI to WordPress
- Exported posts from WordPress (Tools → Export → Posts)
- Imported into Squarespace (Settings → Advanced → Import / Export → WordPress)